Tuesday, December 27, 2016

Continuous integration Automation : Eclipse -> Git & GitHub -> Jenkins

DevOps - Continuous integration Automation with Eclipse, Git & GitHub & Jenkins


Create a new java project in Eclipse -> Add an object in the new Java project -> Add a class in the object -> Write some working code in the class ->


Add the project in local Git repository -> Make some changes in the java code -> Commit the changes in local Git repository using option right click the java project -> Select team -> Press commit -> Update details in Git staging window -> View the commit done in history window ->


Create a remote repository in GitHub from Git Repositories window of Eclipse -> Push the committed change of local Git repository in the remote GitHub repository ->


Create a freestyle project in Jenkins -> Select SCM option as Git and update local Git repository address as repository URL in the Jenkins project configuration ->


Add a Jenkins server in Eclipse using build window -> Select a build job -> Run the build from Eclipse.


Triggering a Jenkins job from an external script


Update the Jenkins build job configuration with option -> trigger build remotely and adding the authentication key ->

Create a post commit script in hooks folder of the Git -> Add following command – “curl --user : ?token=” in the post commit script -> Add a change in the local Git repository master from command line -> Commit the change from command line -> Git commit will execute the Jenkins job.


Wednesday, December 14, 2016

DevOps (Continuous Deployment) - Docker with Puppet

Docker : Containerization Platform -

Docker containers wrap up a piece of software in a complete filesystem that contains everything it needs to run: code, runtime, system tools, system libraries – anything you can install on a server. This guarantees that it will always run the same, regardless of the environment it is running in.

Solomon Hykes started Docker as internal project at dotCloud in France. 1st release of Docker happened in March 2013.

Installing Docker -

Docker is available to download from https://www.docker.com. Download dmg(mac)/exe(Window) file -> Double click and follow the instruction -> Once installed correctly running docker can be viewed in your system tray ->


Kitematic : Running Containers -

Click - open Kitematic -> Kitemitcs will show the list of docker images available to create -> click 3 dots beside the create button -> click ‘view on docker hub’ —> it’ll open a link about how to create, configure, start and stop a specific docker image application ->


Select an image -> Click create -> Kitematic will install the image and start application with default setting - Configure the application as per your requirement -> Multiple containers can be created with one application running in each. Applications within the containers can also communicate to each-other.


Puppet : Configuration Management -

Puppet is a Ruby based configure management tool initially released in 2005. Docker image can be managed & Docker containers can be run using puppet (puppet apply & puppet agent).


Gareth Rushgrove has created a useful puppet resource on installing & managing docker - https://forge.puppet.com/garethr/docker.


Thursday, December 8, 2016

DevOps (Continuous Integration) – Selenium & Cucumber using Maven in Jenkins

Selenium – Automated Testing Framework

Selenium is an open source automated testing software for web application released under Apache 2.0 license. Earliest version of Selenium tool was developed by Jason Huggins in 2004. Later, many people contributed in bringing the Selenium testing tool to its current level.

Selenium download is available at http://www.seleniumhq.org. It’s needs to be configured in IDE like eclipse & visual studio to be used.

Configuring Selenium in Jenkins –

Selenium testing job can be configured in Jenkins as freestyle or Maven project. In freestyle project Selenium job is executed through shell script running the testng.xml. Selenium testing as Maven project in Jenkins is done using pom.xml.

Freestyle Project ->

Create a Java project in Eclipse using option -> New -> Java Project -> Update Project Name -> Click Libraries -> Add External Jars -> Select Selenium-Server-Standalone Jar file -> Add Library – Select TestNG – Click Next – Click Finish – Click Finish ->


Create a script file (mac)/bat file (window) in the project directory using syntax – “java –cp bin;lib/* org.testng.TestNG testng.xml” and save the file in same directory locally.


Create a freestyle project in Jenkins using option –> New Item -> Update project name -> Select Freestyle project -> Press ok -> Click advance under General -> Select custom workspace ->update project home directory in the directory field ->


Next step , under build ->Press Add build step -> Select “Execute shell” -> Update script file name in the command field -> Press apply ->Press save ->


Now, a freestyle selenium project is ready to build in Jenkins.

Maven Project ->

Verify & insure your Eclipse have Maven and TestNG plugins installed -> Create a Maven project in Eclipse using option New -> Project -> Select Maven Project -> Click next -> Check “Create a simple project” -> Click Next -> Update group ID field –> update artifact ID field -> update name -> update description -> click finish ->


Update the pom.xml file with necessary Selenium & testng dependencies and testing.xml file location detail->


Create a test program & generate testng.xml using right click test java class -> Select TestNG -> Convert to TestNG -> save testng.xml file as per pom.xml location specification ->


Next, in Jenkins -> Create New item – Enter an item name -> Select Maven project -> Press ok -> Update pom.xml location file in build section -> Press apply –> Press save.


Now, maven selenium project ready to build in Jenkins.

Cucumber – Behaviour Driven Development

Cucumber is automated testing tool written in behaviour driven development style.

Configuring Cucumber in Jenkins –

Create a project in Eclipse using option -> New -> project -> select Maven project -> press next -> check ‘create a simple project’ -> Press next -> Update group ID -> Update artefact ID -> Update name -> Update description -> Press finish ->


Open pom.xml file -> Update latest stable selenium, junit, cucumber-java, cucumber-junit dependencies in the pom.xml -> Press control^S ->


Install cucumber software update for eclipse from chttp://cucumber.github.com/cucumber-eclipse/update-site using option help -> install new software -> Create a feature file ->


Create a package and java class in src/test/java folder using option new package -> Name the package -> New class -> Name the class -> Add reference of the feature file in the class ->


Create a test step package and java class in src/test/java folder using option new package -> Name package -> New class -> Name class -> Create test steps as per the feature file and reference as ‘glue’ in the earlier defined class - >


In Jenkins, create new project using option -> New Item -> Enter an item name -> Select Maven -> Click ok -> Update location of the the pom-xml file in next page under build section-> Press apply -> Press save ->

Now, Maven-Cucumber project is ready to build in Jenkins.


Saturday, December 3, 2016

DevOps - Continuous Integration : SCM (Git, Github) -> Build Automation (Maven) in Jenkins

Git – Source Control Management

Linus Torvalds created Git in 2005. It’s a version control system freeware. Git works well with non-linear and distributed development. Git gives clone of full development history to each developer. It’s lightweight and support rapid branching & merging.

Git download is available at https://git-scm.com. Image file package installs Git into a default directory of (/usr/local for mac OS) the server with an option to change the directory.

Configuring Git in Jenkins –

Git is configured in CI tool Jenkins as default plugin. If not, it can be configured using option - manage Jenkins -> manage plugin ->


Click ‘available’ tab -> search & select Git plugin -> click ‘download now & install after restart’- submit button. This will configure Git in your Jenkins.


A project is created in Jenkins with Git as SCM using option – new item -> update project name as new item name -> select freestyle or maven project -> press ok ->


Select Git in ‘Source Control Management’ section -> update your Git repository URL in repository URL field -> press apply & save button.


Now, project is ready to build.

Github – Source Control Management

Chris Wanstrath, PJ Hyett & Tom Preston werner launched github in 2008 as repository hosting service which offer all the VCS & SCM functionality of Git with some additional features like bug tracking, wikis & task management.

Github url is https://github.com. It offers private and free repositories.

Configuring github in Jenkins –

Github is configured in CI tool Jenkins as default plugin. If not configured, it can be done using option - manage Jenkins -> manage plugin -> Click ‘available’ tab -> search & select Github plugin -> click ‘download now & install after restart’- submit button. This will configure Github in your Jenkins.

A project is created in Jenkins with Github as SCM using option – new item -> update project name as new item name -> select freestyle or maven project -> press ok -> update Github project URL under general Github project – project URL ->


Select Git in ‘Source Control Management’ section -> update your Github repository URL in repository URL field -> press apply & save button.


Maven – Build Automation

Maven is a build automation tool. Maven manages build, reporting and documentation using a project object model (POM).

Maven download is available at https://maven.apache.org. Image file package installs Maven into a local directory of the server by default.

Configuring Maven in Jenkins -

Maven is not available as default plugin in Jenkins. Maven is configured in Jenkins using option - manage Jenkins -> manage plugin -> Click ‘available’ tab -> search & select Maven integration plugin -> click ‘download now & install after restart’ submit button.

Then, manage Jenkins -> global tool configuration -> under JDK section update JDK version in JDK name -> update jdk location of your server in JDK_HOME ->


Under Maven update Maven version in Maven name -> update maven location of your server in Maven_HOME. This will configure Maven in your Jenkins.


A maven & Github project is created in Jenkins using option – new item -> update project name as new item name -> select maven project -> press ok -> update Github project URL in project URL field under general & Github project -> Select Git in ‘Source Control Management’ section -> update your Github repository URL in ‘repository URL’ field -> check ‘resolve dependencies during POM parsing’ under build section -> press apply & save button ->


Create POM xml with required instruction and save the POM xml file in the Github repository.


Now, a Maven Github project is ready to build.


Wednesday, November 16, 2016

Critical Chain Project Management (CCPM) & Theory of Constraints (TOC) in Software Engineering

Critical Chain Project Management(CCPM)

Student syndrome:– Start the work at last possible moment.

Parkinson’s law:– Work expands so as to fill the time available for its completion.

Bad Multitasking:– As a result of poor prioritization.

In tradition critical path project management, 30-40% time & resources are wasted due to bad multitasking, student syndrome, & Parkinson’s law.


Critical chain project management involves estimating each task of workflow network aggressively eliminating the buffer at individual task level for bad multitasking, Parkinson law & student syndrome, aggregating a buffer for entire project at the end of critical path and managing the aggregated buffer to protect the committed project due date.

Critical chain method differs from critical path in following points mainly.

1. CCPM uses resource dependencies that may not be visible on project network for the resource levelling.

2. CCPM emphasize a good enough solution is sufficient if the solution is delivered in a shortest possible time as there is no analytical method to find an optimal solution.

3. Monitoring & control of project buffer in CCPM as a function of project completion compared to earned value in critical path method.

Theory of Constrains(TOC)

“A chain is no stronger than its weakest link.”


The rate of achieving goal in a system is limited by at least one constraint and practically it’s impossible to have a system without a constraint. 5 focus areas were proposed to break (elevating the constraint’s throughput beyond system’s limitation) system constraint(s) and maximize the rate of achieving goal.

1. Identify the constraint.

2. Decide how to exploit the constraint.

3. Subordinate everything else to that decision.

4. Elevate the constraint to its breaking point.

5. Repeat above steps till all the system’s constrains are broken.

If a constraint’s throughput capacity is elevated beyond the system’s limiting factor, it is considered to ‘break’ the constraint.

CCPM & TOC in waterfall

Planning:– Estimate each WBS task aggressively without any individual task buffer. Add an aggregated buffer at the end of critical path.

Execution:– Avoid multitasking the critical path task resources. Encourage team to complete the assigned task ASAP.

Monitoring & Control:– Monitory buffer consumption as a function of project completion. Use TOC, feeding buffer, resource buffer to protect project due date.

CCPM & TOC in Agile

Release & Sprint Planning:– Encourage team to estimate aggressively in release planning & sprint planning eliminating buffer of individual tasks for bad multitasking, Parkinson law & student syndrome.

Iterations:– Theory of constraint should be used in identifying & resolving impediments. Encourage team to complete the assigned task ASAP.

Review & Retrospective:– A good enough solution is enough if it is delivered in a shortest possible time. Refine CCPM and TOC processes and techniques being used in the project.


Tuesday, October 25, 2016

A Step by Step Continuous Integration Configuration


A step by step continuous integration configuration using SVN, Eclipse, Jenkins, Maven & Junit


1. Subversion - SVN:

Download SVN binary package from https://subversion.apache.org/packages.html suitable to your SCM (software configuration management) server platform and install SVN.


2. Configure SVN:

Configure the SVN with repository setup, user creation & SVN workflow definition.


3. Configure SVN in Eclipse:

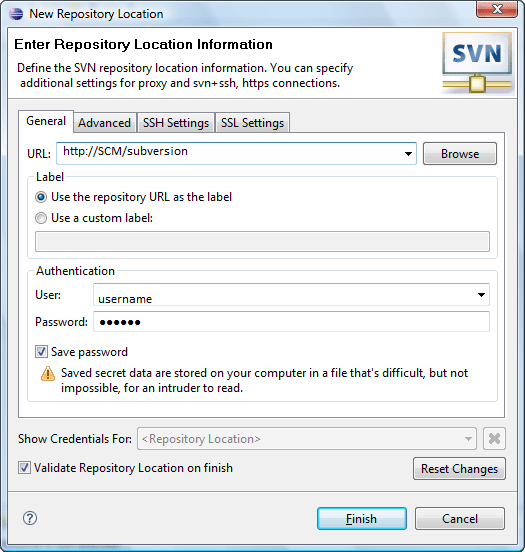
Configure the SVN in developer's machine through their IDE - Eclipse. SVN is configured into eclipse by installing SVN plugin and SVN connector and configuring the SVN repository.


4. Install Jenkins:

Download a configurable Jenkins download from https://jenkins.io matching your CI server platform and install Jenkins.


5. User Control in Jenkins:

Create user control in jenkins using option -> manage jenkins -> configure global security -> enable security.


6. Source Control Management in Jenkins:

Configure the source control ->Configure the source control -> SVN in jenkins using option manage jenkins -> source control management section -> Please put the SVN repository url and add credential in the relevant field to access the SVN repository -> There are two options to pull committed changes from SVN.

a) Polling SCM - Polling SCM needs to be configured in SVN settings of the Jenkins.


b) Triggering build - We need to place relevant scripts for post-commit actions in hooks directory of the SVN to trigger a build remotely into Jenkins.


7. Configure Maven in Jenkins:

Configure the build tool maven in Jenkins using option manage Jenkins –> configure system –> configure maven.


8. Automated unit testing in Jenkins:

Configure Jenkins to run Junit unit cases and publish the unit test result using option configure job –> add build set up –> add post build action of executing test scripts specifying the location of test report xmls.


9. E-mail notification in Jenkins:

Configure e-mail notification in Jenkins using option manage Jenkins –> configure system –> e-mail notification section to notify post build and post unit test results to stakeholders.


10. Automated deployment in Jenkins:

Configure automated deployment in jenkins by Installing “deploy to container” plugin using option manage Jenkins –> manage plugings, then use option configure build –> “post build actions” –> “deploy war/ear to container” -> Mention the required details of target deployment server in deploy war/ear container field of the screen.


Thursday, October 13, 2016

An understanding of Scaled Agile Framework


SaFe has been designed by Dean Leffingwell and his team. The purpose of SaFe is to scale the agile value from a high performing Scrum, XP and Kanban practicing team to a system and an enterprise level in an effective synchronized way.

Portfolio:


Enterprise: Enterprise represents business having portfolios driven by strategic themes as business driver.

Portfolio Management: Portfolio management owns the responsibility of strategy, program management and governance of a specific portfolio driven by decentralized decision making, continuous value flow, epic and rolling wave planning.

Epic owner: Epic owner is responsible for a portfolio level epic starting from its business case stage to approval to value stream implementation. Epic owner collaborates with multiple stakeholders.

Enterprise Architect: Enterprise architect collaborates with business stakeholders and solution architects to drive a holistic technology implementation across the portfolio value stream.

Kanban & Backlog: Portfolio management kanban addresses the flow of epic that affects value streams & agile release trains. Portfolio backlog is the highest level backlog in a portfolio.

Epic & Enablers: Epic holds the economic value of enterprise. Enablers are the technical initiative supporting business value creation at portfolio level.

Budget & Value Streams: Budget is the approved operational cost in terms of CAPEX & OPEX. Value streams are long lived systems delivering continuous value flow to customer of the enterprise.

Program:


PI Planning: Program increment planning is a 2 days release planning meeting at program level attended by agile teams, product management, architects, system team and other stakeholder. PI planning delivers a program level backlog.

ART & RTE: Agile release train is the team of agile teams that plans, commits and executes together. Release train engineer is the scrum master of the agile release train.

Business owner & Product Management: Business owners are responsible for ROI of the value delivered by a release train. Product management creates program vision and it is responsible for managing a program level backlog.

Architecture Runway: Architecture runway is a planned architecture initiative that enhances solution design, performance, cross team design and implementation. It supports emergent design of the agile team.

DevOps, Release Management, Shared Services, System Team, User Experience: These are the essential support systems enabling agile release train to deliver continuous flow of values.

Backlog, PI Objective & System Demo: Program backlog is upcoming feature and enablers. PI objectives are summarized goal that an agile release train intends to achieve. System demo is the integrated & aggregated view of the new features that an agile release train has built.

Feature & Enablers: Feature is the required system functional definition which delivers benefit. Enablers are technical initiative to support the development business initiatives.

Release any time: Release multiple times during an ART flow depending on development & business context.

Iteration:


Agile Team, Product owner, Scrum Master: Product owner is the owner of sprint backlog collaborates with program product manager and agile team. Scrum master facilitates the agile team and coordinates with other team of the agile train. Agile team is a self – managed team which turns the committed backlog into shippable value for the customer or works on a technical initiative.

XP Scrum & Kanban: XP scrum is a 2-3 week scrum iteration. Team kanban facilitates the agile team in delivering a flow of values through a workflow visualization.

Backlog & PI Objectives: Backlog is the team level prioritized backlog. PI objective is a team level business and technical goal summary.

Iteration planning, execution, demo and retrospective: Iteration planning is the sprint planning where team commits the backlog for an iteration and decomposes the committed backlog into sequenced tasks. Iteration execution is the execution of the committed task using daily scrum and Kanban board. Demo is the team level demo and retrospective is the team retrospective on the processes used in iteration.

Built-in quality: Built -in quality is an ongoing commitment & training on innovative lean-agile methods.