Tuesday, October 11, 2016

DevOps – A Snapshot Overview

• At Agile 2008 conference, Andrew Clay Shafer and Patrick Debois discussed "Agile Infrastructure” in August 2008.

• At O’Reilly velociry conference 2009 , John Allspaw and Paul Hammond gave their now-famous talk entitled, “10+ Deploys a Day: Dev and Ops Cooperation at Flickr.” in June 2009.

• The term "DevOps" was popularized through a series of devopsdays starting in October 2009 in Belgium.

DevOps is a culture and practice that emphasizes the collaboration and communication of software development team, QA team and IT operations team while automating the process of software delivery and infrastructure changes. It aims at creating an environment where building, testing, and releasing software can happen rapidly, frequently, and more reliably.

Collaboration, automation, continuous integration, continuous testing, Continuous Delivery, continuous monitoring, and rapid remediation are common in all successful DevOps practices.

Common DevOps Steps & Activities


• Continuous Integration -

Changes are done in small increments and changes are immediately integrated to the larger code base as soon as they are done by the developers in CI practice. Each member of the development team integrates his/her finished code at least daily into the main branch of the code. Once integrated an auto build and auto test is run. Any issue reported in auto build and auto test is addressed by the developer immediately. Notifying the integration issue and fixing the issue subsequently is kept transparent in the team. The team communicates each other more frequently. Rapid feedback, resolving the integration issue early, frequent and open communication in the team enables the team to learn faster and deliver faster.

• Continuous Testing -

Continuous testing is not only a QA function. It starts early with developers delivering an error-free code. Development also helps QA team with test data preparation and configuring the test environment as similar to production environment as possible. Operation team being aware of production usages and loading of the application helps QA to build load and performance testing. Test environments are created and configured using virtualization eliminating the cost & schedule bottlenecks. Automated testing scripts are used as much as possible to speed up the continuous testing. Small changes are tested and deployed into live constantly and development and testing processes are refined through the continuous user feedback.

• Continuous delivery -

Continuous delivery is the next logical step of continuous integration and continuous testing where small incremental changes are pushed into production constantly. Rapid and constant feedback of end-user is used for the course correction. Real-time monitoring and rapid remediation are used to minimize the failure impact. Flagging technique is used to undo and redo the changes and introducing a large change into live environment on incremental basis.

• Continuous Monitoring -

The purpose of continuous monitoring is to detect the service unavailability quickly, understand the underlying reason, apply the learning to anticipate the problems before they occur and be ready with remedial actions. Continuous monitoring start at development by using the same tools to monitor development & QA environments what are used in production environment.

Automation should be used as much as possible in testing and deployment process using DevOps tool-chain. A successful DevOps requires business, development, testing and operation teams to play significant role in each phase of the application lifecycle. A healthy collaboration among these teams is essential in eliminating the unnecessary silos.

Scaling in DevOps adoption:

Success of DevOps adoption is dependent on transforming the culture of collaboration across the teams and quickly learning from rapid feedback and experimentation. Some common steps are -

1. Improvement in quality & speed of feedback to development & testing
2. Blameless postmortems of the issues
3. Reduce the time & resources in creating functionalities from start to complete
4. Improve the repeatability in build & test processes
5. Testing should be not only automated but analyzed also
6. Remove the duplication of work in development
7. Quality and speed in test data & test environment readiness
8. Seamless flow of features from development to live environment

Thursday, October 6, 2016

Continous Integration - A Snapshot


Continuous integration is an agile software development practice which facilitates in integrating the software changes frequently, stabilizes the product though auto building & self-testing builds, and uses rapid feedback to resolve the integration issues faster. The goal of continuous integration is to produce a working build as fast as possible.

A software change has been costly and risky exercise in traditional waterfall practice for many cases due to following reasons mainly –

1. Insufficient testing
2. Bug/issue detected in later stages of the project execution
3. Infrequent commit & difficult integration
4. Inflexible code base & poor version control

Development team integrates its work frequently, usually daily in continuous Integration – an agile practice. This leads to multiple integrations per day. Each integration is verified by auto building & self testing builds to detect any build error and issue with existing functionality of the software. This approach has reduced the integration problems of traditional waterfall model significantly and allowed a team to develop cohesive software more rapidly due to following reasons mainly –

1. Automated and continuous testing happens
2. Issue are detected early and addressed early
3. Regular release with better frequency
4. Better visibility of the project

Key practices of continuous integration are –

1. Maintain a single source repository

This practice facilitates auto building & self-testing of the build which leads to faster integration.

2. Auto building & self-testing builds

Build & automated testing tools are used to enable frequent build & subsequent testing and thus maintaining a clean code base by eliminating human errors.

3. Everyone in team commits everyday

This helps in testing the code development early and detecting the issue early.

4. Fix the broken build immediately

This is a very important practice needs to be maintained as a discipline. It helps faster release.

5. Notify build result to everyone in development team

Everyone is on the same page and team works in a synchronized manner.

6. Automated deployment

Eliminates human error and enables faster release.

CI Tools

There is a long list of CI/DevOps tool used across the CI/DevOps practice in software development. Some of the commonly used are –

FunctionTools
Source code ManagementGit, Github, SVN, Perforce, TFS
Build Tools Ant, Maven, Gradle ,MSBuild
Code Quality AnalysisSonar, Coverity, Fortify
Continuous IntegrationJenkins, TFS, TeamCity, Bamboo, CruiseControl
Automated TestingSelenium, Jmeter , Cucumber
Configuration ManagementPuppet, Chef, Ansible
Continuous Deployment TooluDeploy, Liquibase
Continuous MonitoringSplunk, Nagios, Hygieia

Tuesday, October 4, 2016

A good User Story


A software development requirement for a customer is a product value he/she has asked for. A development team views the same software requirement as work needed to deliver the product value to the customer.

User story in software development addresses the mis-communication between those who uses (user) the software and those who build (developers) it about what (value) the user wants.

3 C’s of User Story

Card - A physical representation of what a user wants in few simple plane statements.

Conversation – Details of story emerges when the developers talk with product owner and customer/customer proxies about who, what & why of the user story.

Confirmation - Objective of story identified after conversation in terms of resolved & agreed acceptance criteria.

INVEST in User Story

Independent

While conceptualizing an independent user story we should think of breaking the story into smaller vertical layers keeping the required development work in mind. This helps in prioritizing the user story in backlog queue. A dependent valuable user story can’t be implemented without implementing lesser valuable stories.

Example:

1. In a report screen, report download feature in excel and pdf should be created as two independent user stories – one for excel report and one for pdf report.
2. User validation and forgot password features in a login screen can be created as two independent user stories.

Negotiable

A user story is not a requirement. It leads to a requirement through a collaborative conversation between development team and product owner and, customer or customer proxies. Negotiation evolves the customer’s need.

Example:

1. “ I want to search an item” of user story will lead to - “I want to search an item by typing first 3 character of the item name” or - “I want to search an item by typing any 3 character of the item name” after a collaborative conversation.
2. “I want to print the letter” of user story will lead to - “I want to print the letter in a blank A4 paper” or - “I want to print the letter in a pre-printed A4 size letterhead” after a collaborative conversation.

Valuable

A user story should be of value to the user, otherwise, these is no reason for the user story to have a place in a backlog and development team to work on the user story. Value also includes something called “non-functional requirements”.

Example:

1. “As a admin user I want to create other users so that I’ll not be dependent on application support team” has a value for the user of creating login ID's independently.
2. “I want to pay by credit card” part of user story has a value of transaction to be secured as per the required regulation.

Estimable

We can’t size the user story without estimating it. If we can’t size it, development team can’t commit the story into a time-boxed sprint. Sometimes, we face an issue in estimating a user story due to its big size. The user story should be broken into smaller stories. Lack of domain & technical knowledge are the other main reasons which hinder a user story estimation. We should research in the respective areas till we are able estimate the user story.

Example:

1. “I want to purchase a product item by paying online” should be broken down into “I want to purchase a product item by paying online using net banking”, “I want to purchase a product item by paying online using credit card” and “I want to purchase a product item by paying online using COD(cash on delivery)”
2. “I want my website to be compatible with all types of mobile devices” requires a technical research spike if development team has not done this kind of the work earlier.

Small

A user story should be small enough to be delivered in one sprint depending on the size of the sprint. “Delivered” means the story gets the “done” state. Team’s capability, technology involved and methodology being used play significant role in deciding how small a story should be.

Example:

1. “I want to use touch id identification in the system” needs to be broken down into multiple user stories depending on the new functionality impact.
2. “I want to use new optional rule to submit the custom clearance application digitally” needs to be broken into multiple user stories.

Testable

Each user story must be testable in order to get it done. Testable acceptance criteria are the key aspect of making a use story testable.

Example:

1. “The application should open in IOS devices quickly” should be “The application should open in IOS mobile devices with 3G/4G connectivity in 1 second with 95% of probability under a full network strength”.
2. “The batch process of the application should complete in two hour of time between 12:00 AM to 4:00 AM” is a testable user story.

Saturday, October 1, 2016

Release Planning - Step by Step


Release planning creates a plan to deliver a product value increment. This plan is called release plan and delivery team commits to the plan. Product owner, scrum master and other stakeholders support the team to achieve plan objective in their respective roles.

Who should attend Release planning meeting?

Release planning meeting should be planned and managed by portfolio management team or the designated scrum master with following invitees.

1. Scrum master – Facilitates the meeting.
2. Business Sponsor – Shares the importance of release.
3. Product owner – Represents business and owner of the product backlog.
4. Delivery team – Shares input on technical feasibility and dependencies.
5. SME & Architect – Provide on-demand expert advice
6. Stakeholders – Impacted by release who help in shaping the release plan.

Input needed

1. A ranked product backlog managed by the product owner
2. Acknowledgement if any new backlog item has been added
3. High level vision and business objective
4. Product feedback, market situation and expected deadline
5. Team’s capability, velocity and availability
6. Meeting rooms, conference bridge, hardware and software tools
7. Flip-chart, whiteboard, marker and post-it

Expected output

1. Release plan and commitment
2. Newly added product backlog item
3. Issues, risks, dependencies, and assumptions to be monitored
4. Suggestions to improve future release planning meetings

Release Planning Meeting checklist

1. Book the calendar of meeting invitees by sending the agenda in advance
2. Plan for the travel if needed
3. Book the meeting room of sufficient size with addition space for breakout sessions
4. Book video conference bridge for distributed teams
5. Arrange laptops, computer and projector
6. Arrange whiteboard, flip-charts, marker, paper, pencil and post-it

Release Planning Meeting Agenda

1. Opening the Meeting -
Scrum Mater welcomes the invitees, states the agenda & purpose of the meeting, and introduces the business sponsor. Business sponsor shares his view on importance of the release.

2. Product vision and roadmap -
Product owner share the product vision with larger picture and roadmap of the product development. Then, he/she explains how this release fits into the larger picture and roadmap reflecting the prioritized product backlog. Any new item added into the product backlog is also shared.

3. Release theme, milestone and number of iterations –
Delivery team leads the review of previous release retrospective and current status of the iterations. All participants decide a release theme & release name collaboratively. Velocity of the team if available is presented otherwise a realist velocity value is assumed. Key milestone delivery deadlines are reviewed. Timeboxes for the release are agreed. All participants come up with 1st draft to release schedule and number of iterations using the roadmap, velocity and key milestone deadlines. Team reviews any new issue & concern has come up.

4. Definition of done, Backlog Item Sizing, Story Mapping
Team and product owner lead the review of definition of done. Definition of done is updated based change in technology and skill of the team and any other environmental factor. Next, delivery team considers items to be included for the release using the prioritized backlog. SME and product owner clarify the queries of the team around user story and its acceptance criteria which helps them in sizing the backlog item in terms of effort. Team uses different estimation techniques (planning poker is the most popular one) for backlog item sizing. Considered backlog items are mapped to iterations of the release. Larger items are split into multiple iterations. Release schedule and number of iterations are reviewed & updated if required.

5. Dependencies, assumptions and adjustments –
Technical, business, infrastructure and operation dependencies are checked. Assumptions are reviewed. Release impacted stakeholders should recheck their respective dependencies and assumption related impact. Release backlog and release schedule are adjusted accordingly if required.

6. Commit, retrospect and close -
Review of the above two steps are repeated till delivery team and product owner reaches an agreement on release backlog & release schedule. Now, it’s time to commit the release plan. Communication and logistics are planned for the release. All participants of release meeting retrospect the release planning meeting and feedback are recorded. Risk, issues, dependencies and assumptions of the release are recorded. Action plan is prepared and assigned to respective owners. Now, release planning meeting is ready to close.

InputStepsOutput
Ranked product backlogPlan Meeting and LogisticRelease Schedule
Vision and Roadmap Share Vision & RoadmapRelease backlog
Business & architect inputsRelease Theme, Schedule, IterationsAssumptions
Velocity & availabilityDefinition of done, story Sizing & MappingDependencies
Meeting roomsDependencies, Assumptions, Adjustments Risks
Tools & stationeriesCommit, Action plan, RetrospectFeedback

Tuesday, March 24, 2015

Requirement traceability in a real time

Requirements are the most important aspect of a project and their collective validity is the sole reason for the continuity of a project. Managing the transformation of business requirements of a project into multiple work products in different phases of the project and finally converting the project business case into an envisaged project benefit successfully without missing any valid business requirement in the process is one of the keys to success of a project. Requirement traceability matrix (RTM) is a very useful tool for this purpose in a software development project. I wish to see a RTM in real time with more meaningful dimensions added to it and this is my objective of writing this blog. I would like to limit my writing in context of waterfall process using the PMI framework, PRINCE2 methodology and scrum model of agile process.

Requirement traceability matrix is used for mapping the work product of different phases of a project with a purpose of controlling the scope creep.

A brief journey of project requirements goes as follow -

a. Pre-Project phase:
It all starts with a business case or statement of work (SOW) in pre-project phase. The approved business case or SOW is the 1st entry in the requirement traceability matrix.

b. Requirement analysis phase:
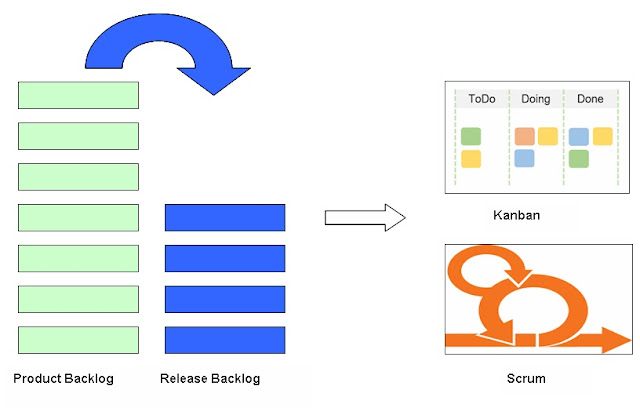
Business case or SWO is expanded into list of business and/or functional requirements in this phase. It’s called discovery or requirement analysis phase in waterfall and initiating a project process in PRINCE2 model. This phase delivers business and/or functional requirements and work break down structure(WBS) in a waterfall model and product breakdown structure (PBS) in PRINCE2 methodology respectively. Now, business and functional requirements are the next level of traceability in the RTM mapped against business case by one to many mapping. Release planning is an equivalent process in Scrum-agile model and release backlog is the output of this process.

c. Design & construction phase:
Depending on size and complexity of the project there could be multiple managed stages in design & construction phase of a PRINCE2 model. Design and construction are single phase each in a waterfall model. Design work delivers high level design (HLD) and/or low level design (LLD) document. Software entities like source code, files and database tables are created in the construction phase after completion of the design work. Now HDL & LLD, and software entities are updated in RTM using the references like section names of design documents, module name of source codes, files names and table names as next level of traceability entries of design traceability followed by construction or build traceability. Now, mapping can be one-one, one-many or many-many. Scrum model goes with sprint planning where the scrum team converts release backlog into sprint backlog. Release backlog together with sprint backlog serves the purpose of traceability matrix in scrum model in my opinion.

d. Software testing:
Testing is usually single stage of a waterfall model but it may have one or multiple managed stages in PRINCE2 model. Test scenarios/cases are referenced into RTM after the construction or build product references using one-many or many-many mapping. Scrum model delivers working software product at the end of each stage. Therefore, testing activity will be part of the sprint backlog.

e. Deployment & support handover:
Deployment & support handover phase creates deployment document, support hand-over document and user manual depending on size and complexity of the project and IT infrastructure. These work products are also mapped against the business requirements in a RTM logically.

f. Updating RTM:
The RTM starts with business case and keep expanding till testing phase. It again converges in deployment and support handover phases.  RTM is updated regularly as any new traceability element is created in any project phase. It should be also part to status reporting. Thus, ensuring the control of scope creep more effectively.

Adding performance parameters like risks, issues, quality, cost and schedule into RTM and mapping these parameter logically makes a RTM more meaningful.

And, here is my thought process -

a. Risk & Issue:
Risk and issue are usually maintained separately in issue and risk registers in waterfall & PRINCE2. Mapping risk and issue in RTM against the business requirements with a designed RAG (red, amber, green) color coding (combination of probability & impact) can give a more detail & granular view of the project risks & issues. It’ll also help in reviewing & managing the project risk & issue in more quantities terms. Risks and issues can be updated in RTM along with risk and issues register using a common format to avoid the rework effort. Risks & issues are maintained usually in daily scrum log of scrum model as we discuss the impediments/obstacles in the daily scrum.

b. Quality:
Quality is managed using quality register in PRINCE2 and various defect reports in waterfall model from quality control point of view. Quality can also mapped against the functional requirements in RTM using the defect metrics and quality register. Information like defect status, defect count, severity and rework effort can be mapped against the functional requirements. This mapping will give a quantitative display of quality across the functional requirements of the project in a real time. It’ll help in managing the quality more objectively. A common template can be used in building the defect metrics or quality register, and mapping them against the functional requirements of the RTM. Sprint review is the measure of quality or quality control process of scrum model. Sprint retrospective can add some lessons learnt quality management inputs to be used for rest of the release backlog.

c. Schedule & cost:
Schedule and cost performance can be mapped against the functional requirement using daily or weekly status of waterfall and checkpoint report of PRINCE2. This will represents a granular view of cost & schedule performance of the project in a real time and it offers a better analysis. Release and sprint burn down charts represent schedule and cost performance in a scrum model.

Managing a project performance would be more predictive if we map performance parameters like issues, risks, quality, cost and schedule into a requirement traceability matrix with a standard color codes using an automated process.

Thursday, March 10, 2011

Risk register and quantitative risk analysis – managing the project risks

Risk management activities of a project typically includes risk management planning, risk identification, qualitative and quantitative analysis of the risks, risk response planning and monitoring and control of the risks.

Risk register -

Risk register is the most used tool in the above processes starting with risk identification. One can build risk register in a simple excel sheet or it can be put as share point and web based tool. Contents of a risk register should be risk ID, risk description, risk category, risk identified date, cause of the risk, descriptive impact of the risk, risk probability, risk impact, risk score, risk priority, risk response, response owner, response action due date, current status, response impact and comment. These fields are populated in different stages of risk management processes.

Quantitative risk analysis –

Estimating probability and impact values of a risk is a key process in risk management process. This process is called quantitative risk analysis. Accuracy of this process impacts response planning, monitoring and control and overall project execution considerably. It’s better practice to put the guidelines in risk register template itself to avoid any confusion. These guidelines are designed in risk management planning process. Probability value will be always between 0.1 and 0.9. Often risk impacts are not tangible enough to be quantified in terms of EMV(Expected Monetary Value). Therefore, having quantitative risk impact value also between 0.1 and .9 is a good idea and general practice. Quantitative risk analysis is repeated many times during monitoring and control phase of the project and risk register is updated subsequently. A risk turns into issue or opportunity when its probability value becomes 1. Again, it’s a good practice to record risk action response impact during risk response planning as planned impact and response action effect after the risk has occurred as actual impact. We can document this impact in terms of %. This helps evaluating the risk response planning. Risk info which can’t be categorized into any field of the risk register should be added as comment in last. Once the risk turns into issue, it can be maintained or monitored separately as issue log or in the same risk register depending on the choice.

Tuesday, February 1, 2011

Requirement traceability matrix – a simple and a powerful tool

One of my colleagues quotes in his signature – “Help me understand your requirements clearly.. so I can help you better through our deliverables.” I too think understanding the requirements of your customer is the most important factor in delivering the project successfully in IT business. A requirement traceability matrix (RTM) is a simple and useful tool which facilitates this understanding throughout the lifecycle of the project. A RTM is useful in many ways.

1. It controls the scope creep. This is the main job of a RTM.
2. It gives very clear picture of project in a simple consolidation
3. It is very Helpful in scope verification
4. It helps in building the customer/stakeholders confidence
5. It simplifies the complex requirements
6. It facilitates in dealing with issues and risks

A RTM can be build in a simple excel sheet, in a SharePoint listing or as a part of an enterprise PM tool. Whatever the way one builds a RTM, it will have the references to all the deliverables of all the stages of the project with some meaningful descriptions.

How to develop a RTM -

The business requirements are built in planning phase of the project. They are decomposed into functional requirement/system requirement specification/WBS in planning phase itself as a part of the scope planning. There will be one -many mapping between business requirement and functional requirement usually. The first version of requirement traceability matrix should be built at this point by writing the requirements clearly along with unique requirement traceability numbers in a tabular form. It is also advisable to get the RTM approved by the customer or the responsible stakeholders after completing a project phase. Technical requirements are built during planning/define or design phase of the project depending on the complexity and business need of the project. Functional requirements and technical requirements can have one-many or many-one mapping. Technical requirements can be referred in RTM as a short description with reference to technical or system requirement specification document. HLD and LLD can be referred in RTM with reference numbers and reference pointers. It’s as simple to do as updating an excel cell. HLD and LLD will have one-one mapping with functional/technical requirement usually. Code references should be made with component name and address of the component and unit testing references should be made with testing case number and location of unit testing document. There will be one-one or one-many mapping between technical/functional requirement and code. Requirement to unit testing mapping will be one-many mostly. Finally, functional testing and system/integration testing should be referred with test case numbers and testing document location address or testing references of the testing tool if a testing tool is being used in the project. Some testing tools also provide in-built RTM. There will be one-many mapping between functional and system testing and the requirements.